Saturday, June 15, 2019

Back in Black

Some of the trim on the Pulsar NX had faded over time.  Additionally, some of it had old wax stains that I was unable to remove using a vinyl eraser (of you've never read about using a vinyl eraser to remove wax from trim, Google it; you'll be amazed).  You can see these marks in the photo below, just above the turn signal.


After some research, I found a product that seemed to be highly recommended for restoring black trim: Forever Black.  This is not a dressing but rather a treatment that will dye the plastic black again.


The result was quite impressive!  After two coats the white marks disappeared and the trim was a nice and consistent black color!

Thursday, June 13, 2019

Rack Rebuilding

Previously I had written about my woes with the rack and pinion on the Pulsar NX.  Since the rebuilt steering rack was leaking, I decided to address the leaks in the original rack myself.


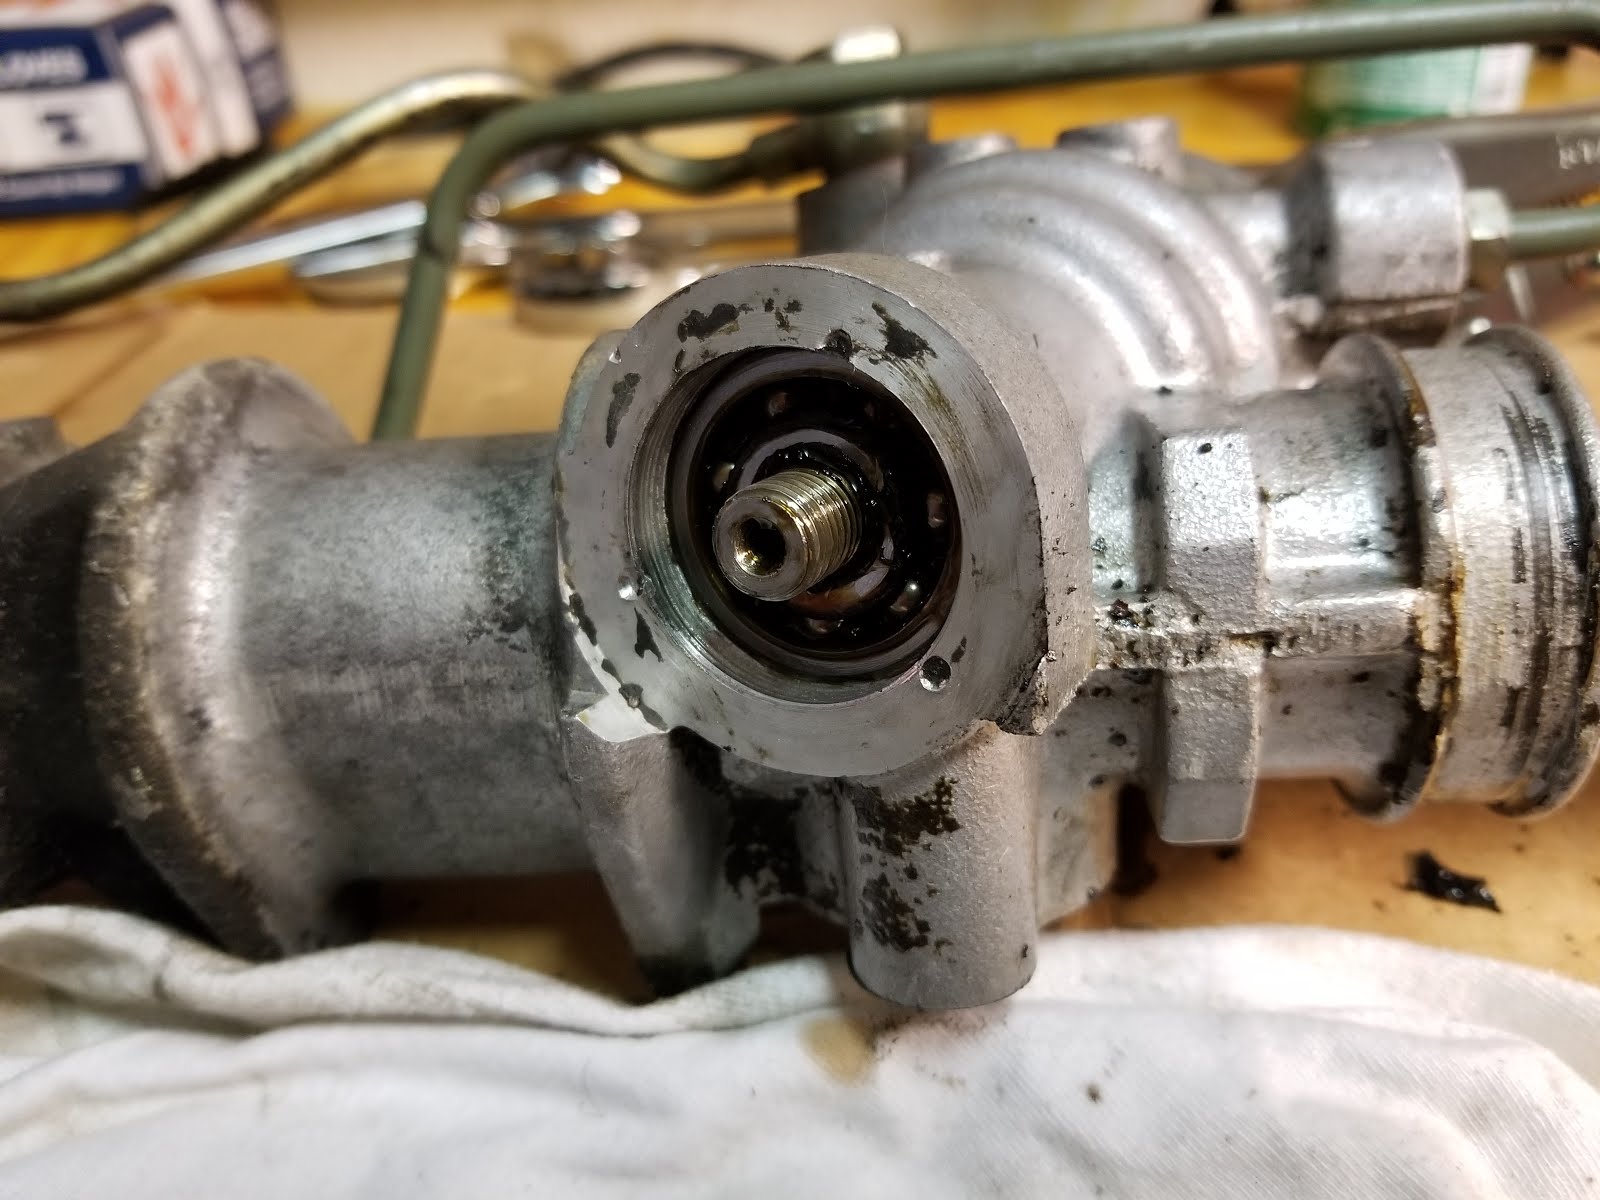
The leak was coming from the input shaft at the pinion gear.  Luckily, the seals in this area were the easiest to access.  


After removing the top retaining clip I was able to remove the top cap and replace the top seal.


The rack tensioner was then removed along with the bottom cap and pinion retaining nut.


At this point the pinion was removed by pulling it out from the top.


To replace the lower seal, the lower pinion bearing must also be removed.  I used a blind puller to remove the bearing and subsequently the lower seal.


I then installed a new lower pinion seal and replaced the bearing using an appropriately sized socket to tap them both into place.  The pinion was then slid back into the rack housing and the tensioner was reinstalled.


The top cap and seal was put back into place and the retaining clip reinstalled.  A fresh set of bellows was installed and the rack was reinstalled into the car.


A vacuum bleeder was used to both purge the air from the system and test for leaks.  The reservoir was topped off and the system was tested.  After several test drives no leaks were found.  I now have to decide what to do with the rebuilt rack, but the ultimate goal of repairing the steering system on the car has been achieved.  


Rebadging

When we purchased the Pulsar NX, the badges on the rear hatch looked odd.  After some research, I found that the badges were reversed from right to left.  This told me that the rear hatch had been repainted.


I found a set of replacements on eBay to correct the positioning of the badges as well as replace the old and faded badges that came on the car.

Monday, April 15, 2019

Update: Starting Issues

As a follow-up to the starting issues I was experiencing on the 280z (Let's Get It Started, This problem is starting to bug me) it looks as if replacing the trigger wire terminal outlined in the latter post is what solved the issue as I have not had a single missed start since.

Saturday, April 6, 2019

Capping things off

As I was replacing hydraulic components on the brake and clutch of the 280z, I noticed that one of the reservoir caps on the master cylinder had a broken tab.  When thinking about replacing it, I realized that the caps on my z did not resemble those from my memory that came from the factory.


After performing a bit of research, I found that Nissan still manufactures the original parts!  A quick order submitted to Z Car Depot and my replacement caps were on the way.


Now those master cylinders look like I remember them...


While I was at it, I figured that I'd replace the radiator cap too as it looked like the one that came on the car 40+ years ago.  Once again some research revealed that the cap was still manufactured by Nissan...


Now all my caps are shiny and new!


Saturday, March 30, 2019

I Will Brake You

Over the winter I noticed that one of my rear brakes began leaking fluid.  The fluid was leaking out of the brake drum and onto the wheel.  The leak was intermittent and seemed to only appear after a cold snap.  I knew this had to be the beginnings of a brake cylinder going bad.  Luckily, the previous owner (Hi Bob!) sent me a box of awesomeness after I had purchased the car.  This box contained 2 new brake cylinders, as set of brake shoes, and the brake hardware I needed to completely replace the rear brake setup.

Removing the old cylinders was easier than I had read; I'm guessing that is because I have the luxury of raising the car on a lift.  The locking clips securing the brake cylinder were not hard to remove and the brake hard lines weren't so corroded that I could not remove them.  I'm glad I didn't experience some of the horror stories I had read online.


After removing the old hardware I cleaned the backing plate thoroughly.  This is important since through 1976 Datsun used a single piston wheel cylinder that moved in the backing plate to keep itself centered as the pads wear.  Once the area had been cleaned I used 3M Silicone Paste to lubricate the sliding area as well as all shoe pivot points, taking care not to get the paste near the braking surfaces.  At this point it is worth mentioning: make sure the self adjusting mechanisms are oriented correctly before installation.  For many this won't be an issue, but apparently some of the parts between the two cylinder boxes were swapped (the adjusters and emergency brake arms are configured for one side or the other); I ended up removing one of the cylinders after realizing this fact.  In the below picture the entire self adjusting mechanism was actually on the wrong side.


After ensuring the cylinders were configured correctly, I set the retaining clips into place using some wide-jaw channel locks to squeeze the two clips towards one another.  I used new springs and pins to secure the new shoes as well.


Once the shoes were set I installed the brake drum and used the following process to set the initial adjustment:
  1. With the drum in place use a large screwdriver or other long blunt object and a rubber mallet to gently tap the new cylinder towards the back of the car just until contact is made.  This sets the rear shoe against the drum.
  2. Open up the adjustment hole on the drum and position the hole just over the adjustment collar on the front side of the cylinder.
  3. Use a screwdriver to turn the adjuster until the front shoe contacts the drum.  
  4. Back off the adjuster about 1/4 a turn or so.
  5. Rotate the drum to ensure there is no binding.  Some resistance is OK, but there shouldn't be a lot and you should be able to turn the drum by hand.
In my case I didn't plug the ends of the brake lines and instead let the brake master cylinder drain completely.  After attaching the hard lines to the backs of the cylinders, I used my power bleeder to run fresh fluid through the lines and bleed the brakes.  I let the car sit overnight and bled them one more time to get the last of the air out of the system.  

As a final step I took the time to adjust my parking brake appropriately, removing a lot of slack that had accumulated from years of cable stretch.  For the first time since I've had the car the emergency brake handle does not need to be vertical to engage the brake!


After a couple of test drives this weekend, I have no evidence of leaks and the brakes are working as expected.

Friday, March 29, 2019

Little Plugs

Another little thing: I replaced the old and cracked rear hatch plugs on the 280z today.


A New Position

The connector on the throttle position sensor had become brittle and lost its retaining clip some years ago.  I finally got around to replacing it.


While I had the connector off, I tested the TPS to ensure that the contacts were still good and that it was adjusted properly.  Everything checked out.  The tool in the picture is a BlueDriver multimeter; if you work on older cars and need a multimeter you can't go wrong with this unit.  It has automotive-specific functions such as a tachometer and dwell and is priced very reasonably.


Standard Motor Products makes replacement connectors for most of the under-the-hood connectors in the older Datsuns.  I used the three-connector pigtail to replace my crumbling original connector.  After noting the positions of the wires on the original connector and matching them to the wires on the replacements, I cut and soldered the wires into place.


Heat shrink tubing was used to protect the individual splices as well as create a sheath around the entire bundle.


A quick test drive after replacement showed that things were working normally.  Another minor repair complete!

A Slave to Corrosion

While the clutch slave cylinder was replaced just before I had purchased my 280z, I noticed that it had been steadily corroding over the last three years.  


I decided not only to replace the cylinder, but also to take measures to prevent the new unit from rusting like the old one.  I accomplished this with some Rustoleum caliper paint.


After the paint cured I used a new rubber hose and some stainless bolts to attach the new slave to the transmission.


I then used a power bleeder to restore fluid to the system.


The result is a smooth clutch that has a bit better feel than the previous unit.  More importantly, there is no longer a rusting chunk of metal attached to my transmission.

Tuesday, February 19, 2019

The car that started it all

While digging through some old pictures recently I came across the below picture...  the car that began my affection for the Datsun/Nissan Z car!  

Shortly after my family moved to Tennessee in the early 80’s, my father purchased a 1976 Datsun 280Z for my mother to drive. The car was then handed-down to my older sister. Once she purchased a new vehicle, the 280Z sat unused. I spent a summer tinkering with the car before I could drive, thinking that it might be mine soon. When I finally obtained my license, I was given a newer car instead of the 280Z and we sold the 280Z not long thereafter. I always had fond memories of that car. 

The Datsun/Nissan Z line has always captivated me and remains my favorite series from any car manufacturer.