Thursday, August 15, 2019

The Smoking Chamber

The next find from my DIY smoke machine was a leak around the throttle valve shaft.


One of the common issues with the L28E engines that could contribute to idling issues is the BCDD (boost controlled deceleration device) mounted to the bottom of the throttle body.  This leak is a great reason to not only clean and rebuild the throttle body, but also check out the BCDD as well.

Removal was quite simple since I already had the air flow meter removed.  Four bolts and the assembly came right off.  In this picture I had already removed the dashpot and bracket.


Removal of the throttle valve itself involved removing the throttle return spring and linkage from the side of the body as well as the throttle position sensor.


Then the two screws holding the throttle valve plate to the shaft could be removed and the shaft slid out the side.


At this point I used throttle body cleaner to thoroughly clean the body, valve and shaft.  Upon inspection of the shaft, I found no apparent wear and the shaft fit fairly snugly into the body.  Not wanting  to reassemble without addressing the leak around the shaft, I addressed the leak from two directions.

First, I used silicone grease to lubricate the shaft bushings.  This likely would have addressed the leak for some time, but I wanted to take it a step further.  I then decided that a perfectly spaced o-ring that barely touched the throttle body when it was closed would prevent a leak at idle (where the leak would make the biggest difference).  To do this I mounted an o-ring on the throttle valve shaft and used a thin piece of aluminum (from the bottom of a Coke can) to space the o-ring.


The spacing is critical because no lateral pressure can be applied to the shaft otherwise the throttle valve will bind; it was meant to have some free play from side-to-side and the closing of the valve would center the shaft.  In my case the o-ring ever-so-gently came to rest against the body when the valve was closed.  Some silicone grease on the o-ring will hopefully prevent it from shrinking for some time.

I then moved-on to the BCDD.  I once attempted to adjust the BCDD to see what impact it would have on my idle issues, but the set screw against the adjuster was frozen.  With the throttle body off the car I should be able to loosen this set screw easily.  Well...


So much for that idea; the set screw sheared.  The good thing is that with the unit removed, I can drill out the screw easily.  the other good thing is that the BCDD has two set screw locations, so I don't need to tap the hole that I drill and thus I won't have to disassemble the unit.


I reassembled the throttle body and reattached the throttle position switch.  I adjusted the switch such that the idle position was triggered at the very end of the travel.  I also verified that the "full throttle" position was triggered at about 30 degrees rotation per the FSM.


The throttle was then returned to it's home on the intake manifold using new stainless bolt and a fresh gasket.  


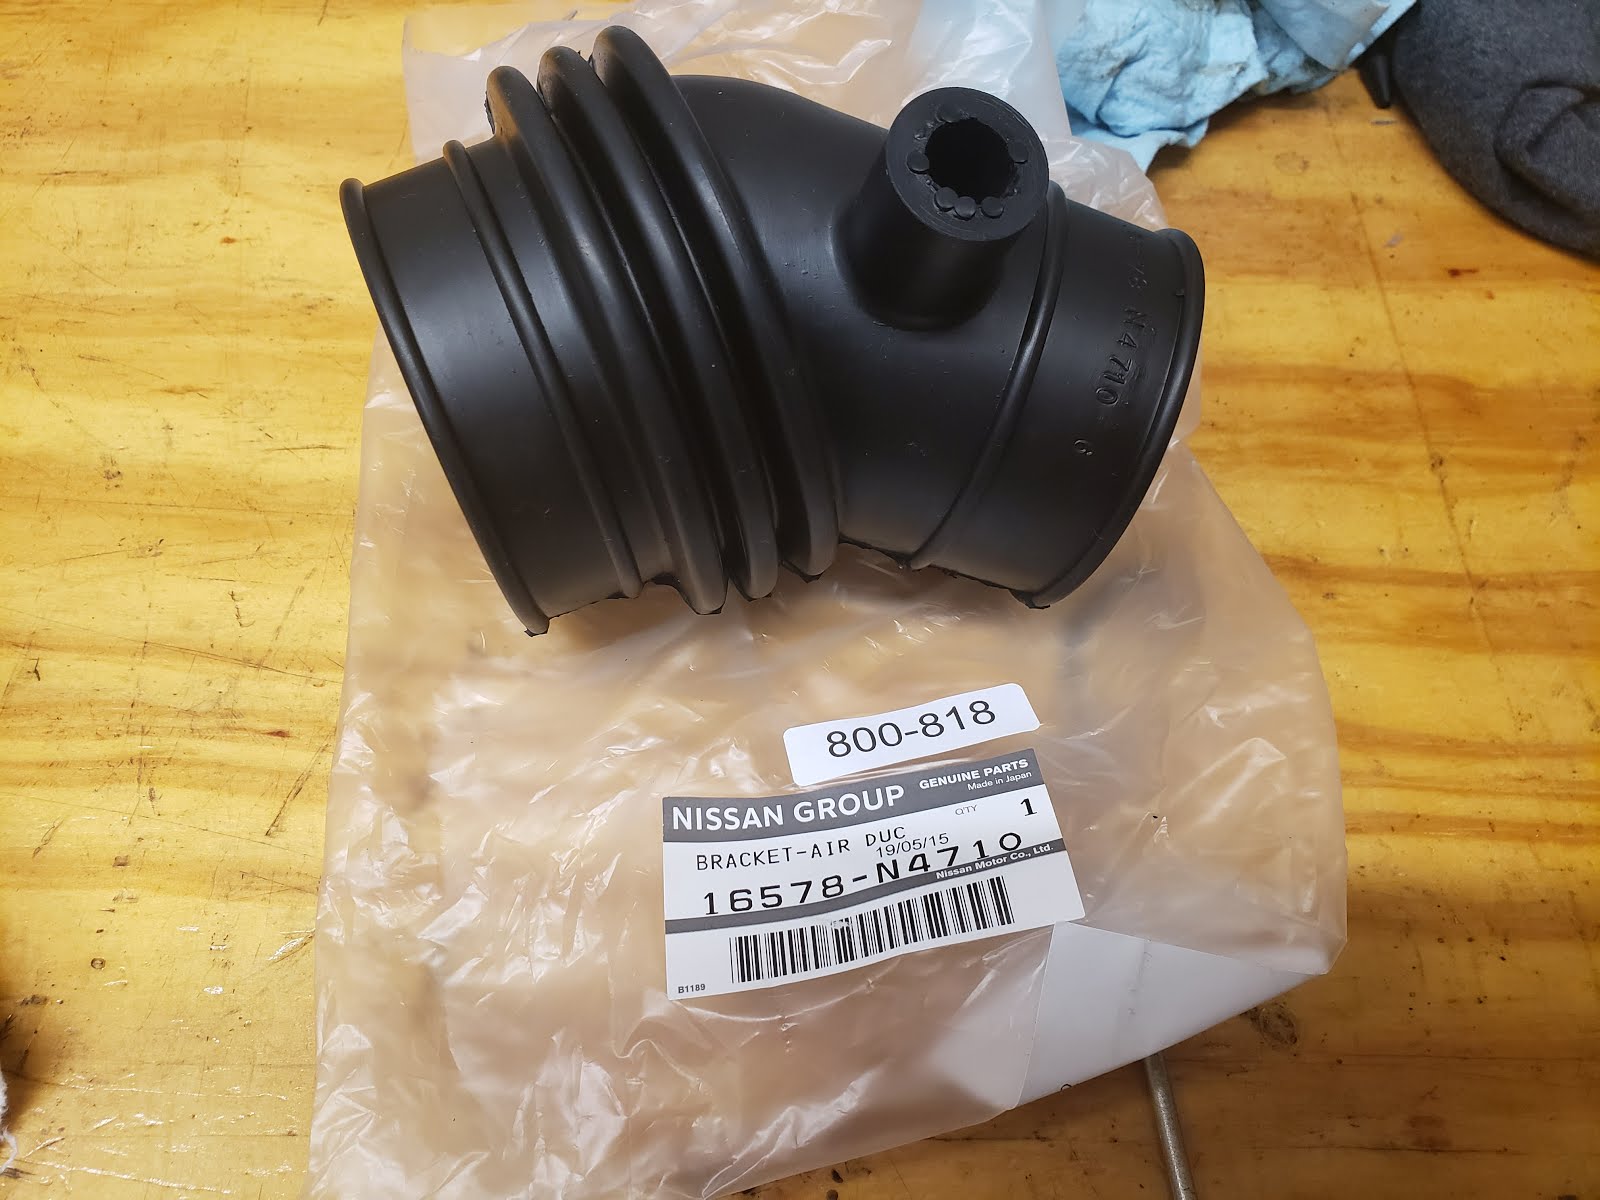
Since my original throttle duct had a crack in it (that I fixed with Shoe Goo) I purchased a new unit from Z Car Depot.  It turns out that Nissan still makes these!  Based on the casting flaws matching on my original and new duct, the same mold is still used to make these.


With everything reassembled I ran another smoke test.  The o-ring seal and greased shaft was holding pressure, along with the other fixes documented in previous posts also being effective.


Tuesday, August 13, 2019

Smoking in the Can

The next vacuum leak revealed by my DIY smoke machine was at the valve of the fuel vapor canister.


A closer inspection revealed a crack in the valve cap (see below photo just at the base of the nipple).


Since the crack in the nipple was only in the top of the valve, I was able to use my plastic welder with a fiber-flex rod to seal the leak.


Once the weld cooled I used my Dremel to smooth out the weld and make it look good.


Since this air line was in-line with the vacuum advance solenoid, I not only sealed up some unmetered air but I also let the ignition advance get the vacuum it needs to work properly!

Monday, August 12, 2019

It's All Smoke and Meters

After building a smoke machine to detect vacuum leaks, I hooked up the machine to my 280z.  After just one pump I noticed some smoke coming from the air flow meter.


In this case the smoke was coming from the bottom of the cover over the resistor board.  Since I had never run any tests on the AFM, I decided this was the perfect opportunity to remove and test the unit before sealing it up.  Additionally my fuel pump would run when the engine was not running.  This is a safety feature controlled by the AFM so this would give me an opportunity to correct this issue as well.


After removing the AFM I gently scraped the existing glue and silicone from the cover (it looked like it had been opened before).  Removing the cover revealed some internals that looked almost new.


Fixing the fuel pump shut-off was simply a matter of slightly bending the small spring that counteracts the main spring at the very beginning of the movement (seen opposite the weight in the picture above).  This bend allowed the door to completely close and thus the fuel pump switch to open when no air was moving through the intake.


I then ran through the tests outlined in the factory service manual, measuring resistance between pins.  All tests passed with flying colors.

I used some Ultra-Black RTV silicone to reattach the cover and seal the unit.  A subsequent smoke test proved that resealing the cover corrected the leak.  I also confirmed that the fuel pump did not run until air was flowing through the meter.

Sunday, August 11, 2019

Building a Car Vaping Machine

I've been chasing an issue with my 280z where the car idles very low when cold but runs perfectly when warm.  To start ruling out potential causes, I decided to look for vacuum leaks.  Now certainly one could check for vacuum leaks using some DIY methods like spraying carburetor cleaner all over an idling engine until a difference in RPM is heard.  Those carb cleaner and propane methods of detecting leaks seemed imprecise to me.  Recently I had watched some videos on YouTube on how to make a smoke machine for the purpose of detecting vacuum leaks in engines.  This video is the one that I followed most closely to construct my smoke machine: Best Automotive Smoke Machine You Can Build.  The video details the steps to build the unit, which requires a pickle jar, soldering iron, bicycle pump, epoxy, a Bic pen, vinyl tubing, a sock and baby oil.  It feels rather McGyver-ish, but the end result is VERY effective.


In addition to building the smoke machine, I also picked up a device that can inject smoke into the manifold while also sealing the end: AUTOOL Easy Intake Adapter.

This device made it extremely easy to test the intake manifold for leaks.  


I will detail the detection of each leak and it's correction in subsequent posts.