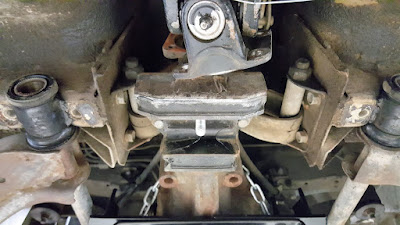
I started by removing the exhaust. This began with removing the exhaust shield from the catalytic converted (mine is a California model) and the rest of the exhaust. There were a few stuck bolts to contend with here but nothing too bad.
Once the shields were off I removed the rear pipe and muffler. One thing I noticed while removing this was that only one muffler mounting strap was holding the muffler in place, and that strap was seriously degraded. The other had let go many years ago.
The pipe flange bolts released without too much difficulty after a shot of PB Blaster and coaxing with a breaker bar. The catalytic converter came off in the same way. I did notice that the cat wasn't blocked at all and still looks good; I wonder if it had been replaced at one point.
After the exhaust was out of the way I was able to remove the driveshaft shield by removing the mounting bolts, noting which positions had the extra support braces in place.
The NVH block (Noise, Vibration, & Harshness) was next to go.
While it was in my face and accessible I took the opportunity to adjust some slack out of the emergency brake assembly. This was as simple as backing off a lock nut and turning the adjuster.
You can see in this pic that one of my output shaft seals is leaking. From what I can tell the replacement of these seals is simple. The pinion shaft seal is not quite so simple, though. Since mine isn't leaking I might just leave it.
Next I removed the rear sway bar. This was as simple as removing the bolts on the frame mounts as well as the control arms then working the bar out of the area.
You can see the rubber on the drop links aren't in the greatest of shape; these will be replaced with poly counterparts later.
The half-shafts were next to go. I removed the bolts at the diff and stub-axle, then worked them out of the area. The universal joints feel solid on these so I don't think any replacements will be necessary; I'll clean them and shoot some grease into the fittings.
The prop shaft was next to be disconnected from the diff. I didn't remove the entire shaft as I just changed the transmission oil, so I improvised a hanger to hold the shaft out of the way while removing the diff. Ironically enough, the universal joints on the drive shaft are loose and since they are staked, I'll have to replace the entire shaft. I guess I'll be buying another gallon of MT90 after all. At this point I also removed the front cross member as well. I was worried that the control arms would drop or shift when I did this, but they stayed in place, even with the weight still on the rear wheels. Note that at this point I also had a transmission jack underneath the diff since I was removing the front cross member which bore weight.
At this point the rear mustache bar diff mounts were removed. These are studs and on one side the nut released while on the other side the stud released. It would have been easier if both studs had released, but whatever...
I then carefully worked the diff out of the area while lowering it on the jack very slowly. After some maneuvering, I had it clear.
Finally, I wanted to remove the mustache bar. The only way to get that out would be to remove the rear cross member. I reinstalled the front cross member (just to be cautious and ensure the control arms didn't move), then removed the rear cross member, along with the drop mounts from the body. At that point I could then remove the mustache bar.
The mustache bar bushings will be replaced with poly soon which is the reason for the latter work in removal. Now it's time to work that stuck fill plug out of the differential cover...


